So, I’m NOT that clever with FreePBX yet - My friend set mine up for me and my folks.
So, I have a hyper-V set to 20Gb (Not good) - It filled up the other day and stopped working. Thankfully I had a copy of the VHD file and I got the system back up and going in 5 or so mins.
However, I want to increase the HDD space from say 20Gb to 100Gb on the Hyper-V. I tried to expand it there and it killed the image. So, in silly simple insructions - Could someone tell me how to increase the HDD capacity of the hyper-V virtual free PBX hard drive please.
You need to add disk space, and also probably mess with the partitions.
My opinion: upgrade all nodules to the latest version, take a full backup, download a clean image (same version as you are currently running) do a fresh install on a new VM (remember to give enough space) and retrieve from backup.
** As with all things Hyper-V, before you do anything, make a backup of the VHD and then if you screw anything up, you can just switch back to the old VHD, All instructions past this point will assume you have a GOOD backup! **
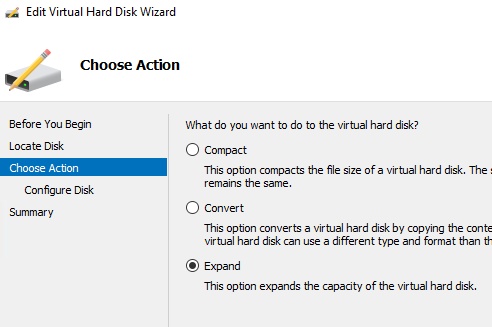
Stretching a drive in Hyper-V is fairly Simple - shut down the machine, go into Properties of the VHD(x) and choose Edit:
Then choose Expand:
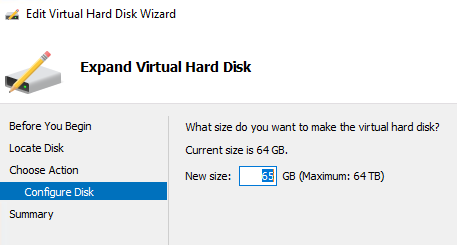
Finally, pick a new size for the Drive:
When this is done, you will have a larger drive - BUT - your Partitions on the drive will be the same size they were before - the drive will just be bigger.
On a standard Load, partitions are laid down like so:
Device Boot Start End Blocks Id System
/dev/sda1 * 1 39 307200 83 Linux
Partition 1 does not end on cylinder boundary.
/dev/sda2 39 8257 66014208 83 Linux
/dev/sda3 8257 8355 786432 82 Linux swap / Solaris
[root@pbx-bdc ~]#
If you look at the Start and End you will see that the partitions are actually laid down like this on the Drive:
/boot
/
/swap
This is a problem - because the Swap is AFTER the root (/) partition - so you will need to nuke the existing swap, extend the root but make sure you leave enough space for swap, and then recreate the swap - Here is a guide I have used in the past to increase partitions sizes:
Again, because you are working with a backup, you can proceed with confidence.
You may also need to edit your /etc/fstab after you are done: